A Crash Course on RAM
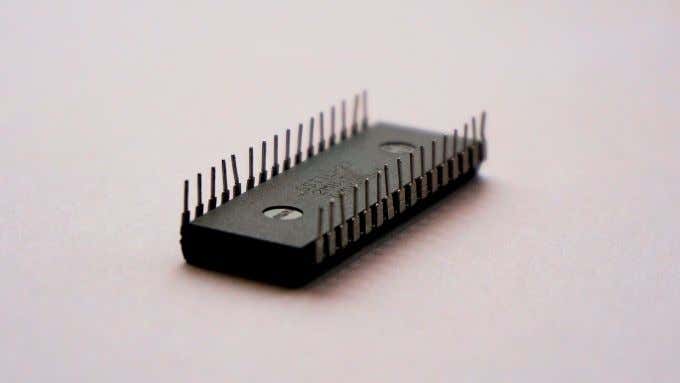
Before we get into the details of how to check the type of RAM your computer is equipped with, it’s important to make sure we’re all on the same page. RAM or Random Access Memory is a special type of very fast computer storage. It’s different from your hard drive, which is relatively slow and non-volatile. That is, your hard drive doesn’t lose its data when the power is turned off. RAM, on the other hand, is volatile which, as you’ve probably guessed, means that its data disappears when the electrons stop flowing. RAM is crucial in a computer, because the CPU (Central Processing Unit) needs to have swift access to the next set of data it has to process. So applications and relevant data are loaded into RAM, which ensures the computer can perform at its peak. If you want to know more about the technical details of RAM, check out Understanding Types Of RAM Memory & How It’s Used.
Checking Your Motherboard Manual or Website
If you just want to know what type of memory your computer supports, perhaps for the purposes of an upgrade, you can find that information in the motherboard’s manual. You can also Google the motherboard’s model number to find its product page. That will list the exact types of RAM that it supports. While this doesn’t tell you the exact speed and capacity of the RAM that’s currently installed in the system, it does tell you what type of DDR the system supports and at which speeds it supports it. It should also tell you what the maximum amount of RAM you can install is.
Use CPU-Z to See Your RAM Type
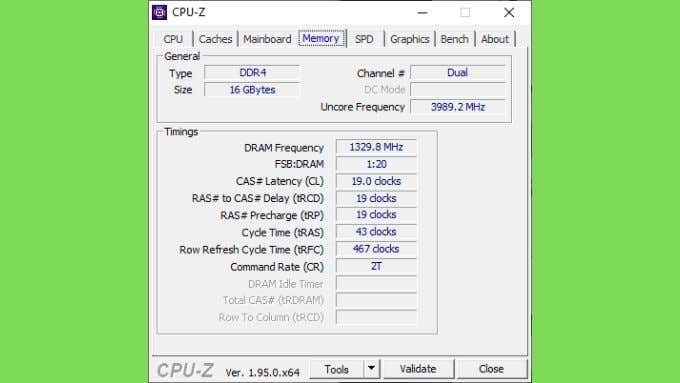
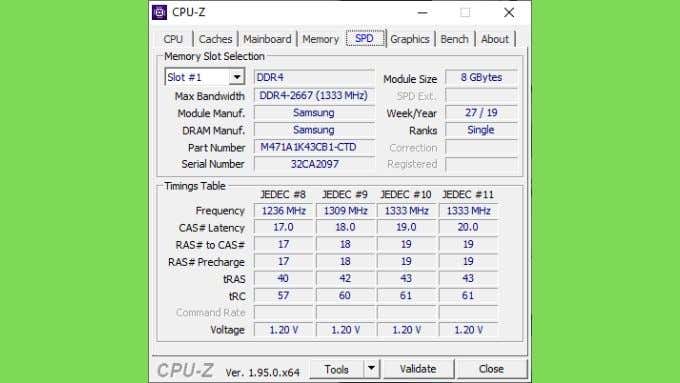
One of the easiest ways to get this information is by using a free application called CPU-Z. We have been using it for years to quickly check the most important technical details about a system. After downloading and installing CPU-Z, run the program and select the Memory tab as shown here. Under the “General” section, look at “Type”. This tells you what generation of DDR memory your system has installed. Under “Size” you can see how much RAM is installed Next, switch to the “SPD” tab. This is where the information is displayed as reported by each individual RAM module. If all the modules in your system are identical then you don’t need to switch between them under the “Memory Slot Selection” dropdown. As you can see here, this computer is using Samsung memory with each module accounting for 8GB of RAM. This system is using DDR4-2667 RAM. You can check the number of available slots by counting them in the Memory Slot Selection dropdown menu. You don’t have to worry about the Timings Table in the lower half of the window, but if you are curious about what those numbers mean, you can find out more in our RAM overclocking article.
Getting Your RAM Info from the Command Prompt or PowerShell
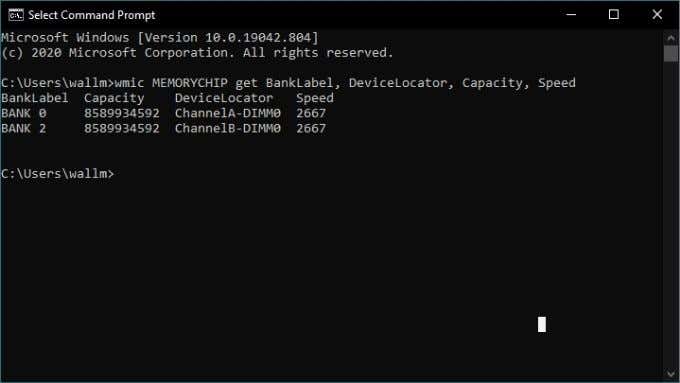
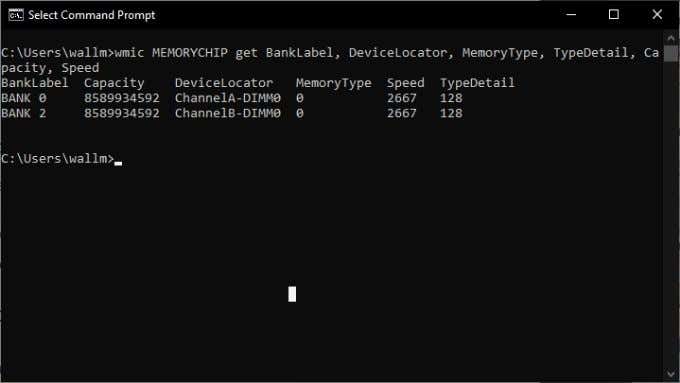
Sometimes you’re stuck in a situation where you don’t have access to the graphical user interface of Windows or perhaps you simply prefer the cold, infinite black depths of the Command Prompt. Either way, there’s a Command Prompt instruction that lets you see what’s currently installed in your system. All you have to do is type: wmic MEMORYCHIP get BankLabel, DeviceLocator, Capacity, Speed This shows you details for each RAM module as you can see here. This shows you the size and speed of each memory module, but doesn’t tell you the type of memory. If you want that information, we need to add a few bits to the command. wmic MEMORYCHIP get BankLabel, DeviceLocator, MemoryType, TypeDetail, Capacity, Speed Under MemoryType you’ll see a number code. This code tells you what type of DDR the system has:
22 – DDR225 – DDR326 – DDR4
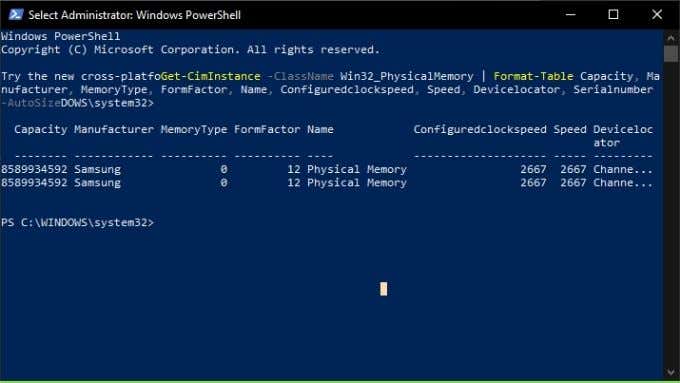
That’s just a selection of the most common RAM types, but if you see a number not listed above you can find a full list of memory type codes in Microsoft’s documentation. Command Prompt is being phased out in favor of PowerShell, if you prefer to use that you can, but the command is a little different: Get-CimInstance -ClassName Win32_PhysicalMemory | Format-Table Capacity, Manufacturer, MemoryType, FormFactor, Name, Configuredclockspeed, Speed, Devicelocator, Serialnumber -AutoSize
Check the BIOS
Regardless of what operating system your PC uses, you can often get information on what type of RAM your system uses before you even boot into it. The computer BIOS will usually have a section for memory, which should show you details about the installed RAM. This typically includes the generation of DDR you’re using, what size each module is and the speed at which it operates. The method for entering the BIOS differs between computers. It’s usually a simple key press right after the computer powers on. For example, you many have to repeatedly tap the Delete key or perhaps F12 to enter the BIOS. The specific key is usually shown on-screen just as the computer starts, but it will also be in the motherboard manual.
Look at the Module’s Notches and Pins
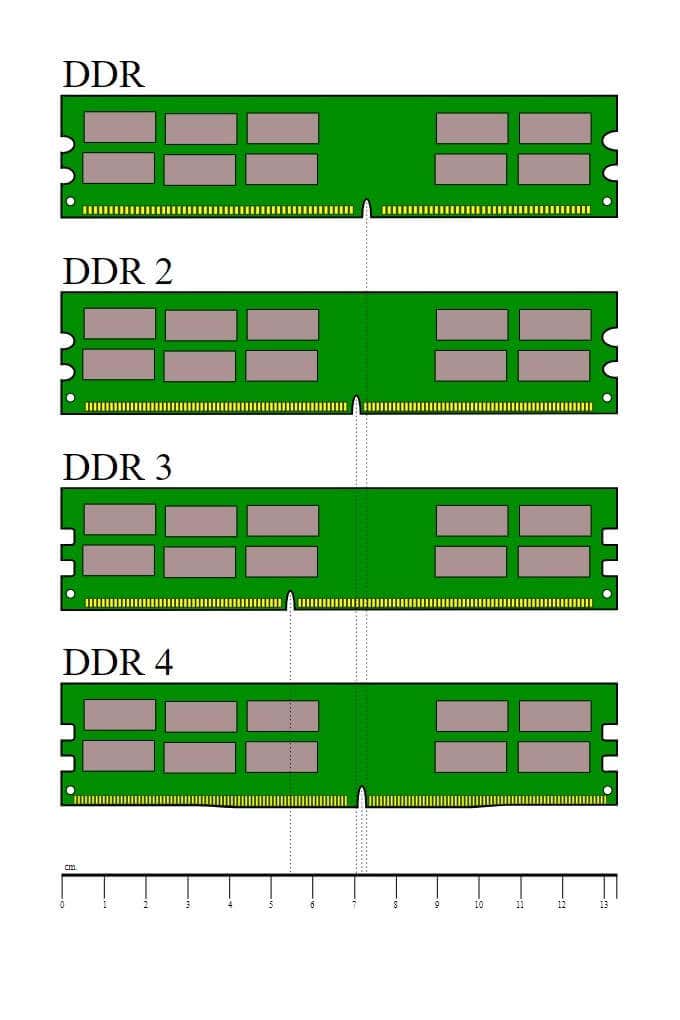
The final way to determine which type of RAM your computer has is to physically inspect the memory modules. This will involve removing them from their slots, so only do this if you are comfortable with the process. The details of the RAM modules may be readable on a label attached to the DIMM, but you can also identify them by the location of the notch, as seen in this illustration.
What About Laptop RAM?
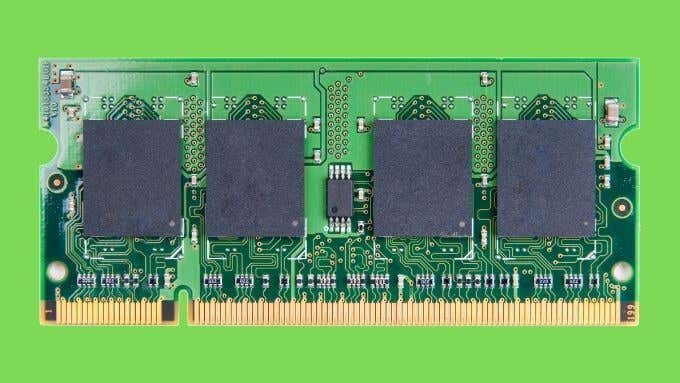
Most of what’s written above applies to laptop RAM, at least when it comes to the software-based methods to check RAM type on Windows 10. When it comes to the physical identification methods, these mobile RAM modules look different from desktop ones. Usually they are either upgradable SODIMM modules or are non-removable and soldered to the laptop’s mainboard. Check out Can You Upgrade an Old Laptop for more information on laptop RAM specifically.
What’s Your Type?
Knowing what type of RAM your system has empowers you to get a picture of what your computer’s performance should be and how far you can upgrade it. There’s always some debate on how much impact RAM speed has on real-world applications, but then again if your system supports a higher class of RAM speed and your applications in particular can benefit from it, it’s worth having this information.

