Excel is packed with many features, including one called Speak Cells, which basically lets you feed your chosen cells to a text-to-speech engine. It is a great accessibility tool – when my eyes are too tired to read the cells on my computer screen, I just let Excel read aloud the values for me.
Enable Speak Cells in Excel
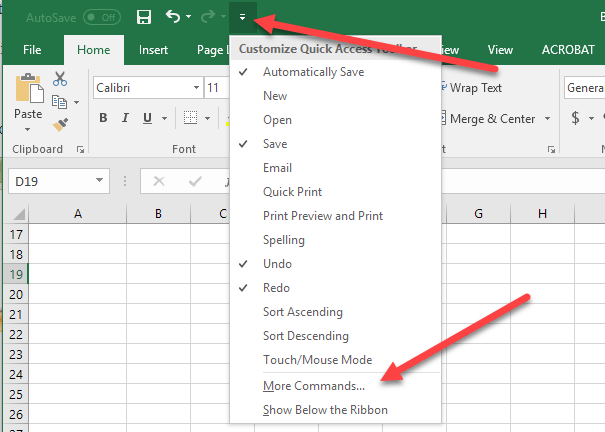
By default, it is not easily accessible in the Excel menu, so a little tweak in the Quick Access toolbar is necessary. First open the Quick Access Toolbar then choose More Commands:
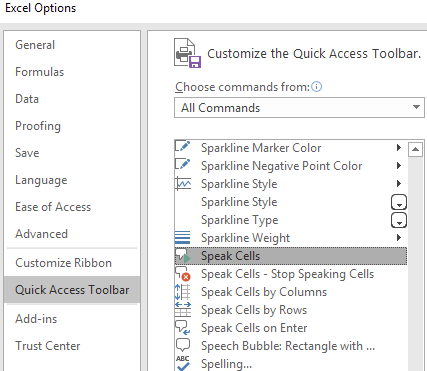
Under the “Choose commands from” dropdown choose “All Commands” then choose the Speak Cells commands.
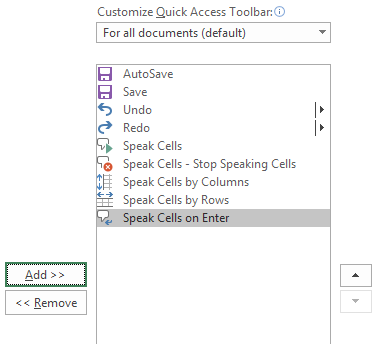
Make sure to choose all Speak Cells commands so they will be added in your menu:
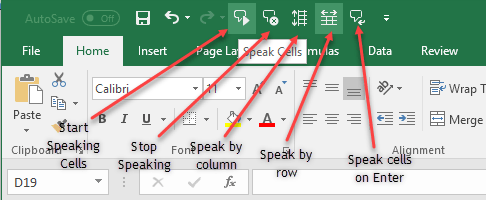
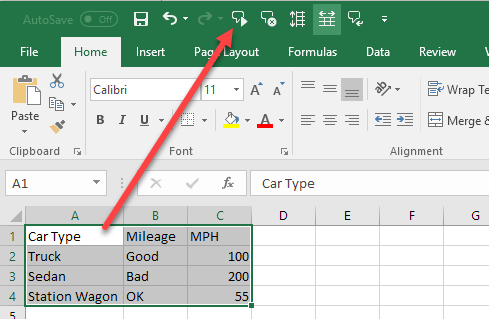
Click OK to apply the changes. You should see the buttons appear on the menu:
To use the commands, select the cells that you want to be read then click the Speak Cells button.
The computer voice will speak the values of the cells you selected. BY default, it will read them by rows. To switch between speak by rows or speak by columns, just click on their corresponding buttons as shown in the screenshot above. These two buttons act like a switch. Only one is active, so when you click one of them, the other one gets deactivated. Also, the last button is the Speak cells on Enter option. When you click on this button, it will speak any cell when you press the Enter key. Overall, it does a pretty good job of reading the text, especially if you are using a newer version of Windows and Office like Windows 10 or Office 2016. Here’s an audio sample of Excel reading the four rows in my Excel spreadsheet. This is one of the best accessibility features of Microsoft Excel. This feature helps me validate data in cases when I’m too tired to accurately read the values of many cells. Enjoy!
