To use this procedure to recover your network security key, you must have a computer already connected to your Wi-Fi network. Windows 7, unlike previous versions of Windows, allows a fairly easy way to view your network security key on the screen in plain text. NOTE: Because the network security key will be displayed in plain text, be very careful when and where you use this procedure. Make sure no one is around peering over your shoulder or glancing at your screen.
View Wireless Network Key
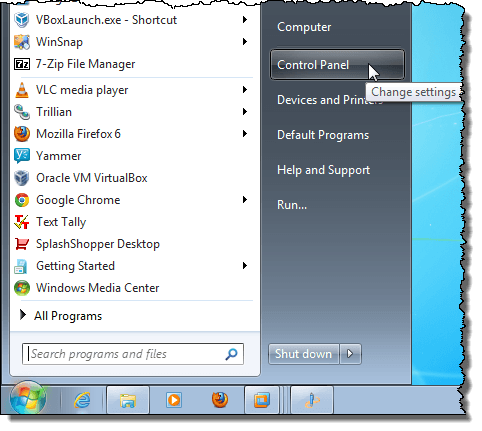
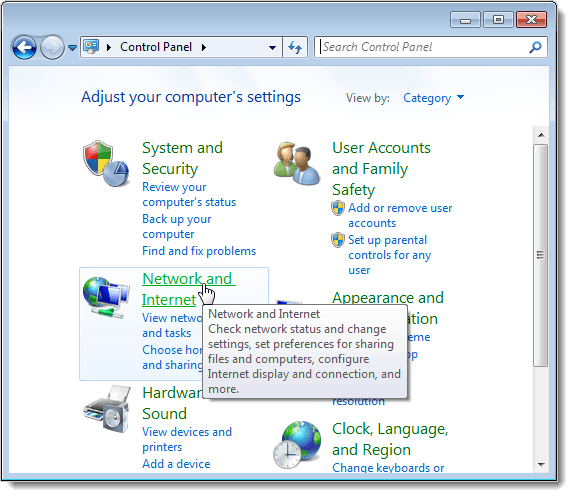
To begin, select Control Panel on the Start menu.
If you have selected Category as the Control Panel view, click Network and Internet.
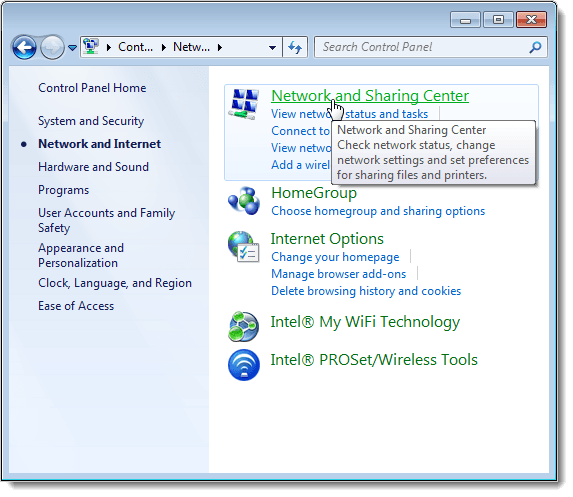
On the Network and Internet window, click Network and Sharing Center.
If you have selected Small icons (or Large icons) as the Control Panel view, all available items on the Control Panel are available. Click Network and Sharing Center.
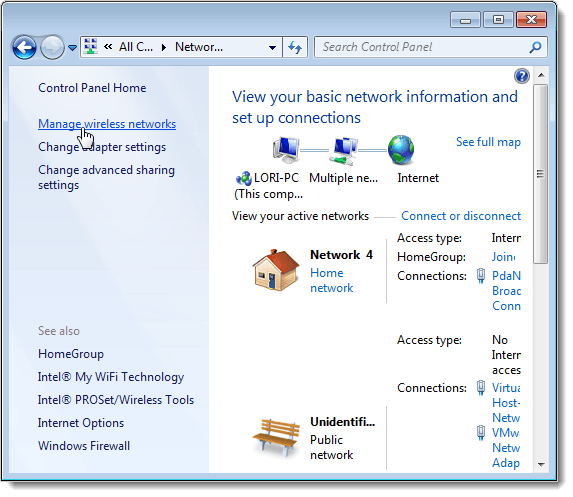
On the Network and Sharing Center, click the Manage wireless networks link in the left pane.
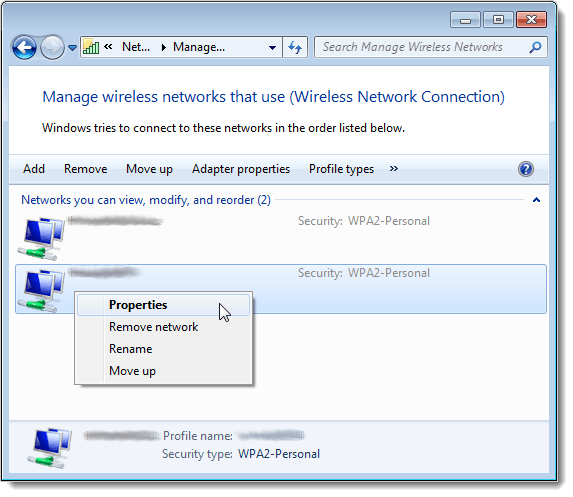
Your wireless networks are listed on the Manage wireless networks that use window. Right-click on the wireless network for which you want to view the network security key and select Properties from the popup menu.
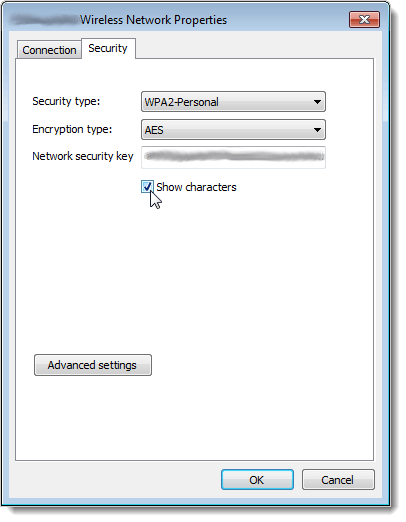
The Wireless Network Properties dialog box displays for the chosen network. By default, the key in the Network security key edit box is displayed as dots rather than plain text. To view your network security key, select the Show characters check box so there is a check mark in the box. NOTE: To protect the security of your network, as soon as you have your security key, select the Show characters check box again so there is no check mark in the box and your security key is displayed as dots again. Click OK to close the dialog box.
Again, be very careful where you view your network security key in plain text to preserve the security of your network. Only use this procedure if you really need to. If you are using Windows 8 or Windows 10, the process is a little different. Read my post on how to view your saved WiFi password in Windows 10. Enjoy!
![]()
